


This article is prepared by our Salesforce Developer Konstantin Sitkin.

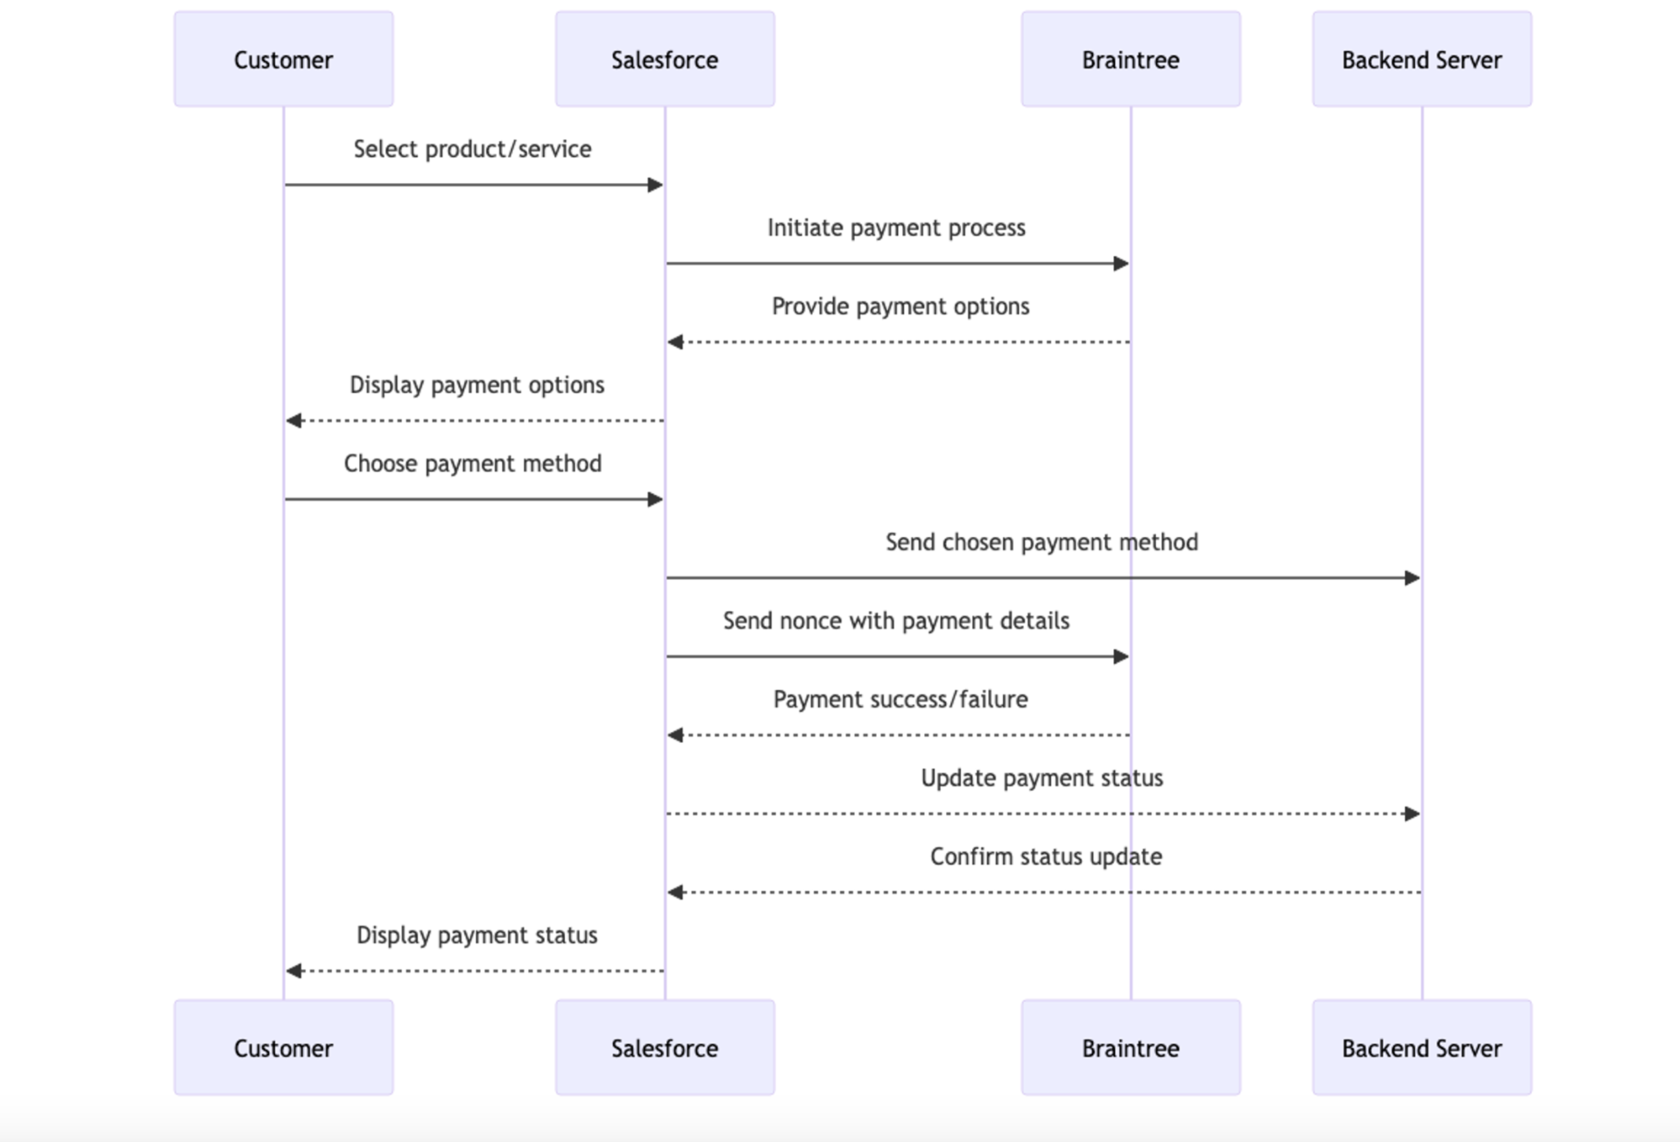
Integrating payments into your Salesforce solution typically involves setting up both a client-side environment configured with a payment SDK and a server-side component equipped with a backend payment SDK. This dual setup is essential for processing payments. Exploring a typical payment flow, such as that for a PayPal Braintree Drop-In integration, highlights this process:
- Client SDKs are tasked with gathering details of the payment method, such as credit card information or PayPal accounts.
- Server SDKs handle the communication between your server and the Braintree gateway, managing payment requests and processing.
What is a Nonce?
In the context of Braintree, a nonce is a secure, one-time-use reference to payment information. It represents the payment method details and is generated by Braintree's client-side SDK.
The nonce is used to securely transmit payment information from the client to your server without exposing sensitive details like credit card numbers.
The nonce is used to securely transmit payment information from the client to your server without exposing sensitive details like credit card numbers.
What are the Payment methods?
- Credit and Debit Cards: Braintree supports major credit and debit cards, including Visa, Mastercard, American Express, Discover, JCB, and Diners Club.
- PayPal: As a PayPal service, Braintree seamlessly integrates PayPal payments, offering a familiar checkout experience for users.
- Apple Pay: Braintree supports Apple Pay, enabling secure and fast payments on iOS devices and Safari.
- Google Pay: Google Pay integration is available, allowing users to make payments using their Google account.
- Other Local Payment Methods: Depending on the region, Braintree supports various local payment methods.
Connecting Payment Methods to Drop-in UI
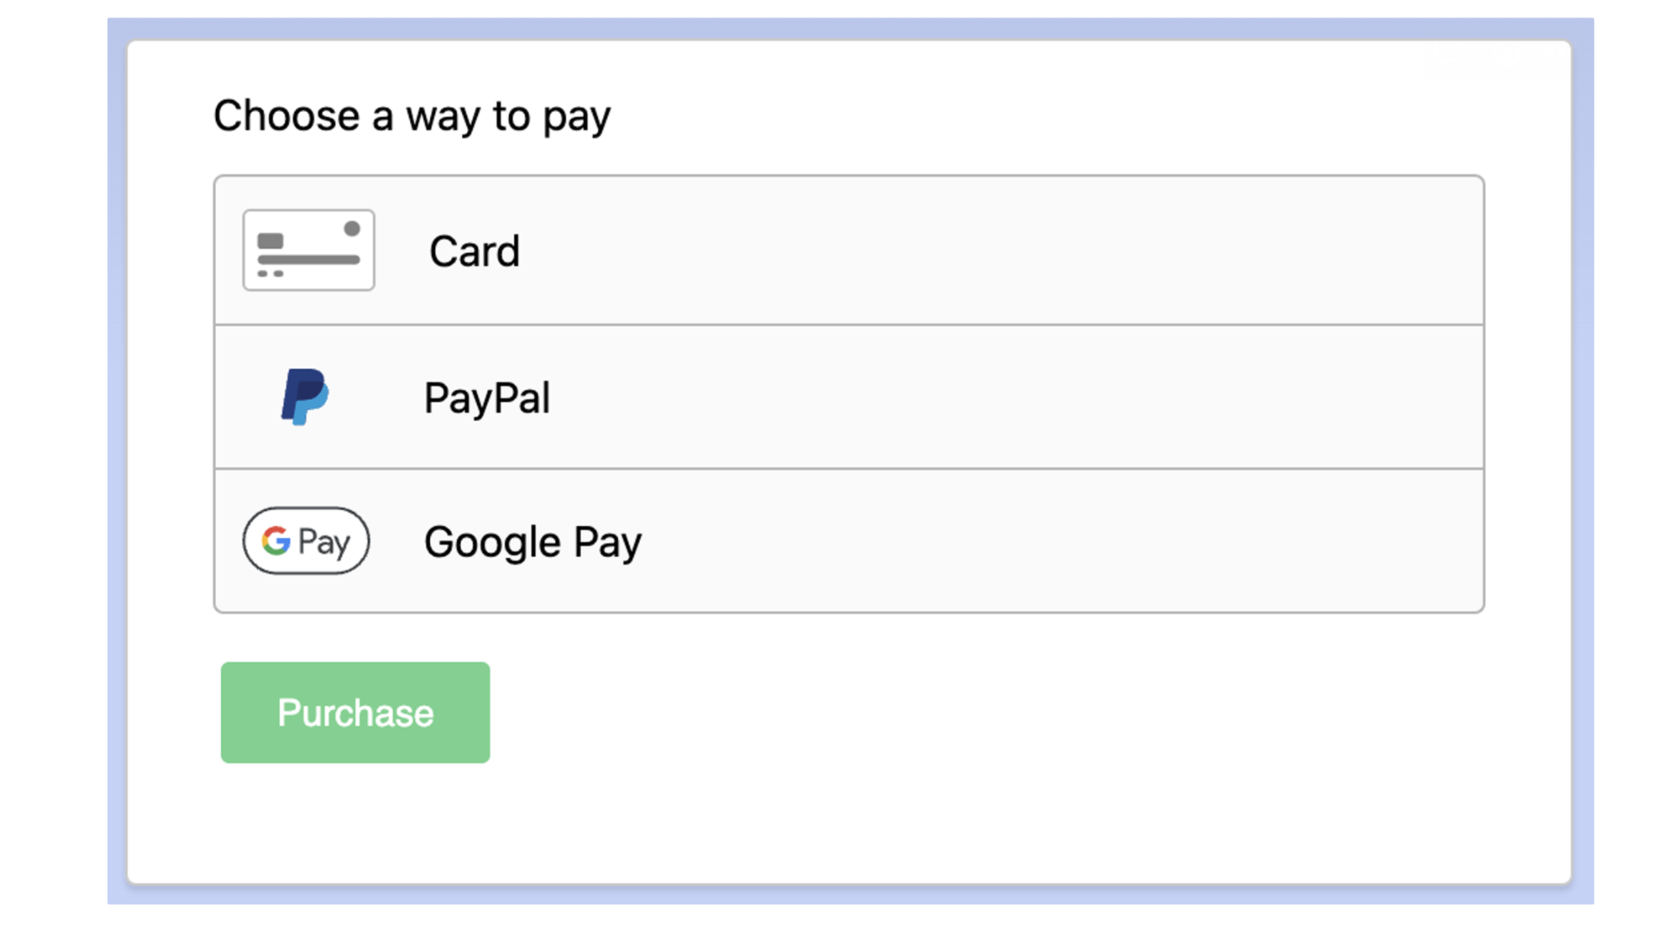
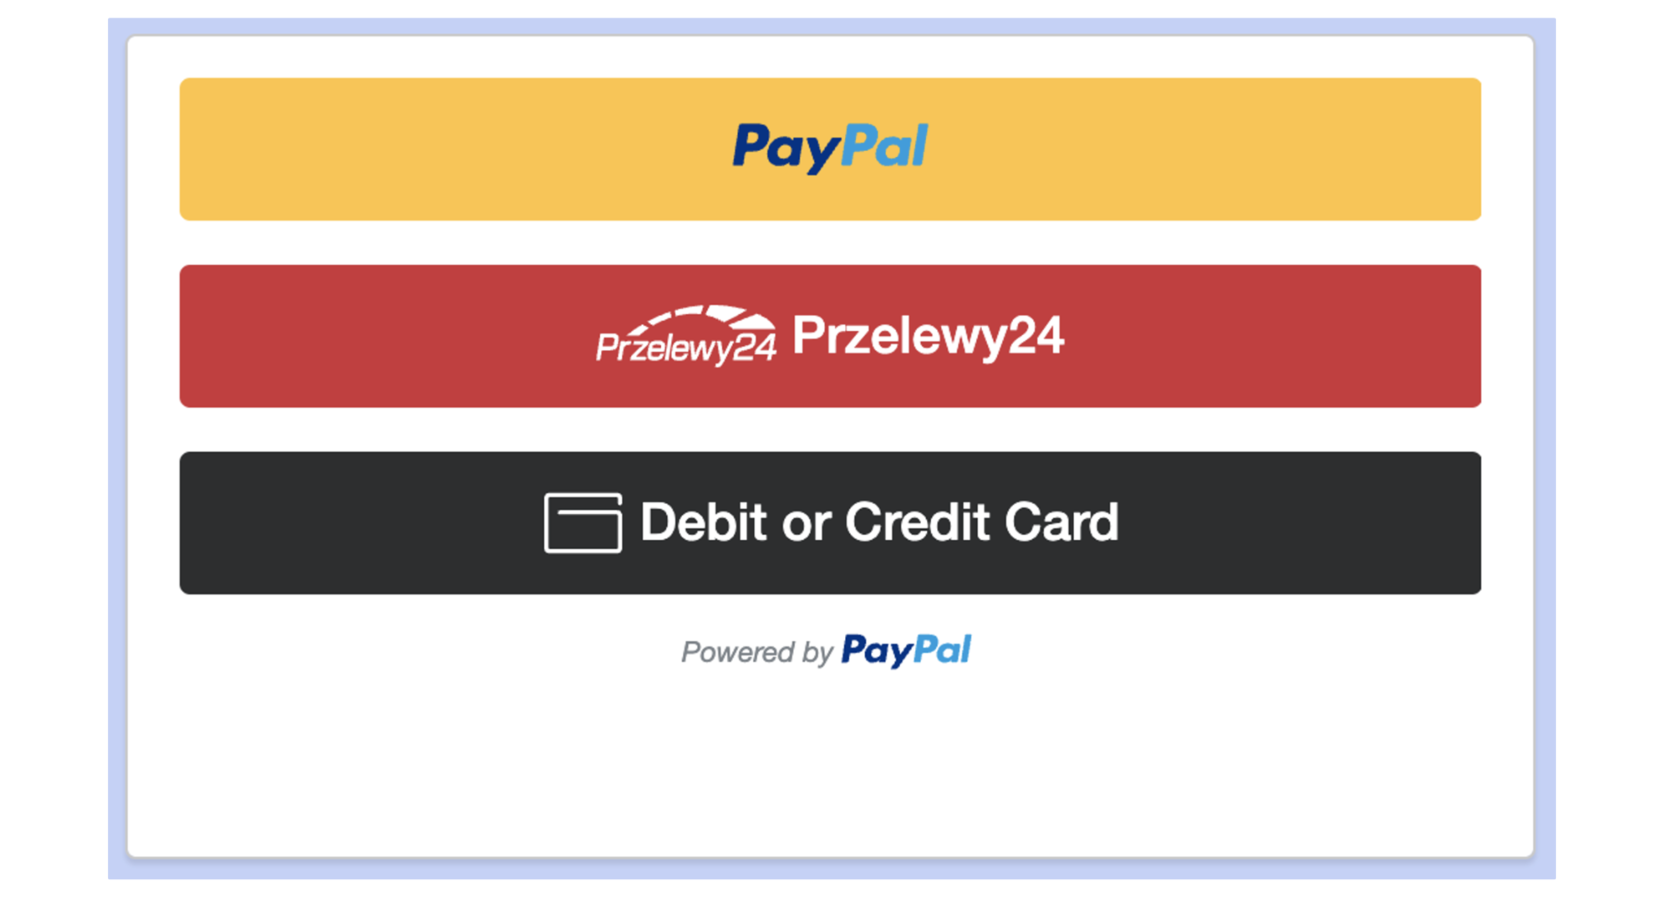
The Drop-in UI is Braintree's pre-built, ready-to-go payment UI, offering a quick way to start accepting payments.
However, you would need to set up a node.js server hosted in Heroku, and integrate your Salesforce client with node.js backend.
Connecting Payment Methods to Hosted Fields
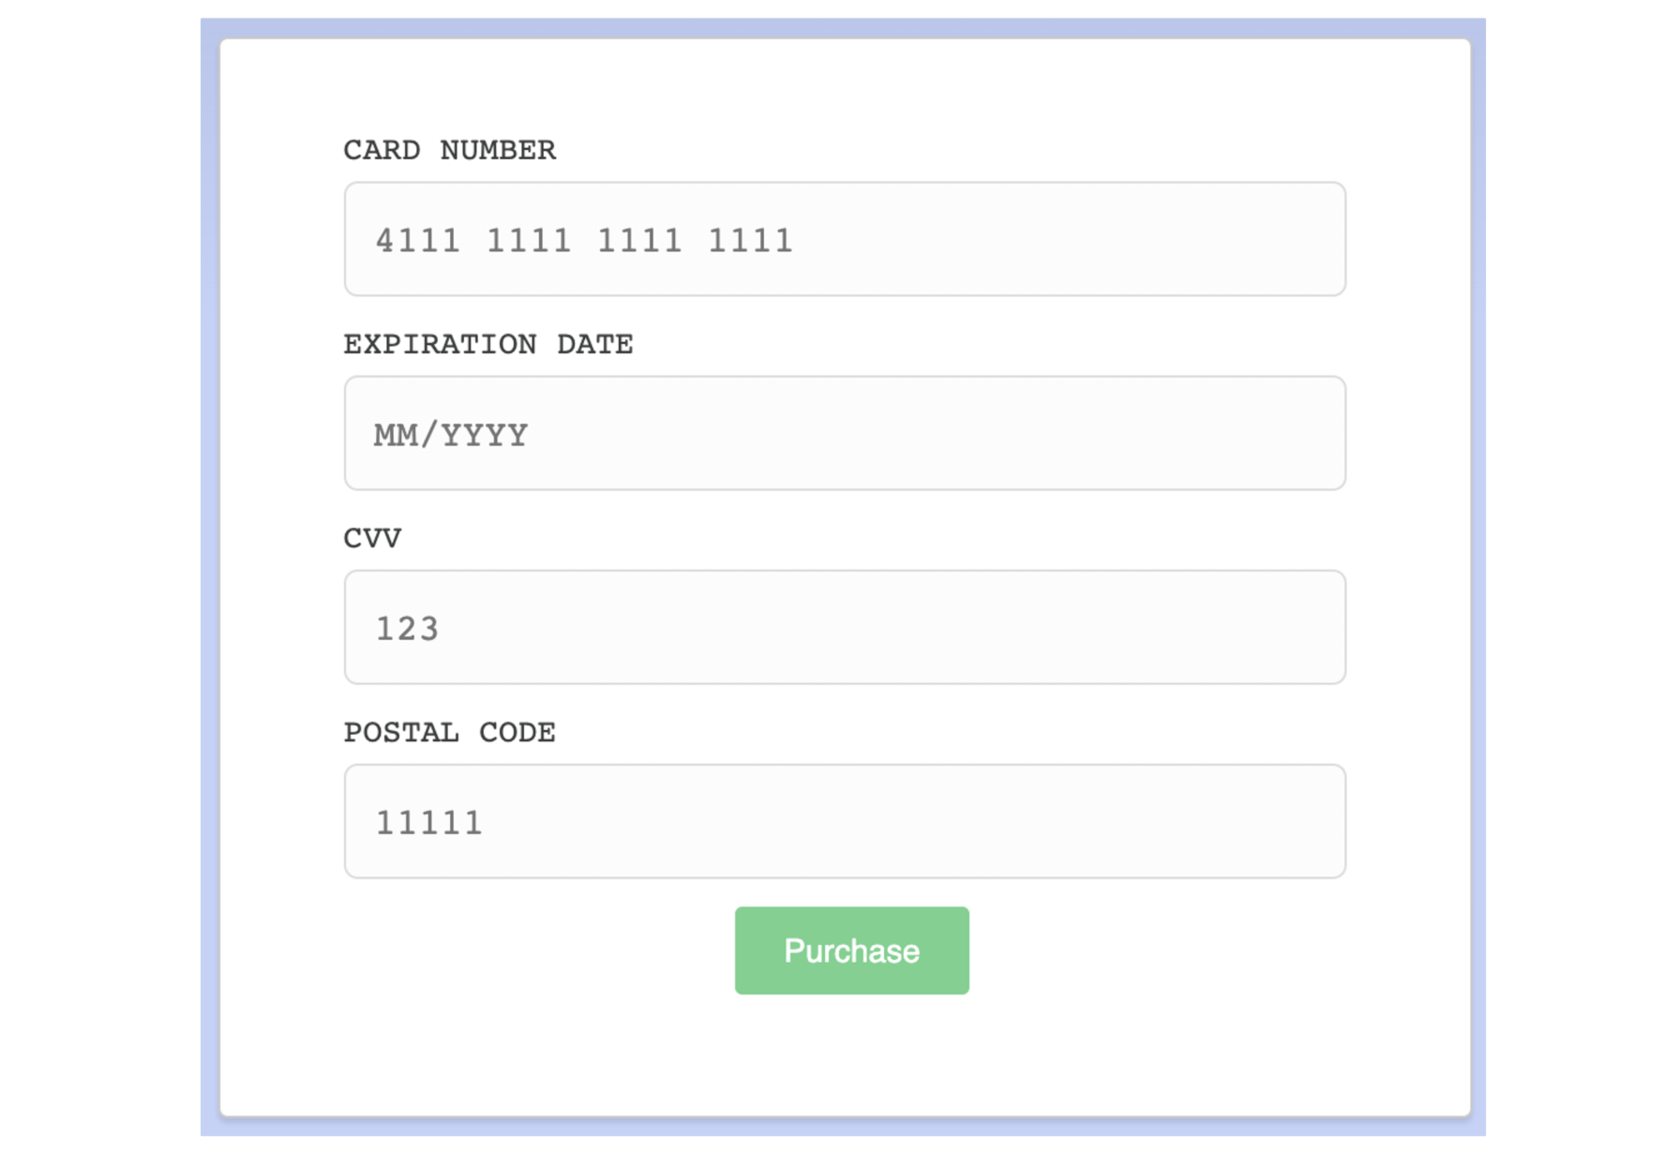
This is a similar approach, hosted fields are sdk components that replace individual fields in your checkout form, such as those for card number, expiration date, and CVV.
Collected payment data must be sent to a secure node.js server hosted in Heroku to capture the payment.
PayPal JavaScript SDK Alternative
To avoid creating a separate backend server, you can use PayPal JavaScript SDK for checkout experience, and use Salesforce only to display payment options and save completed payment transaction.
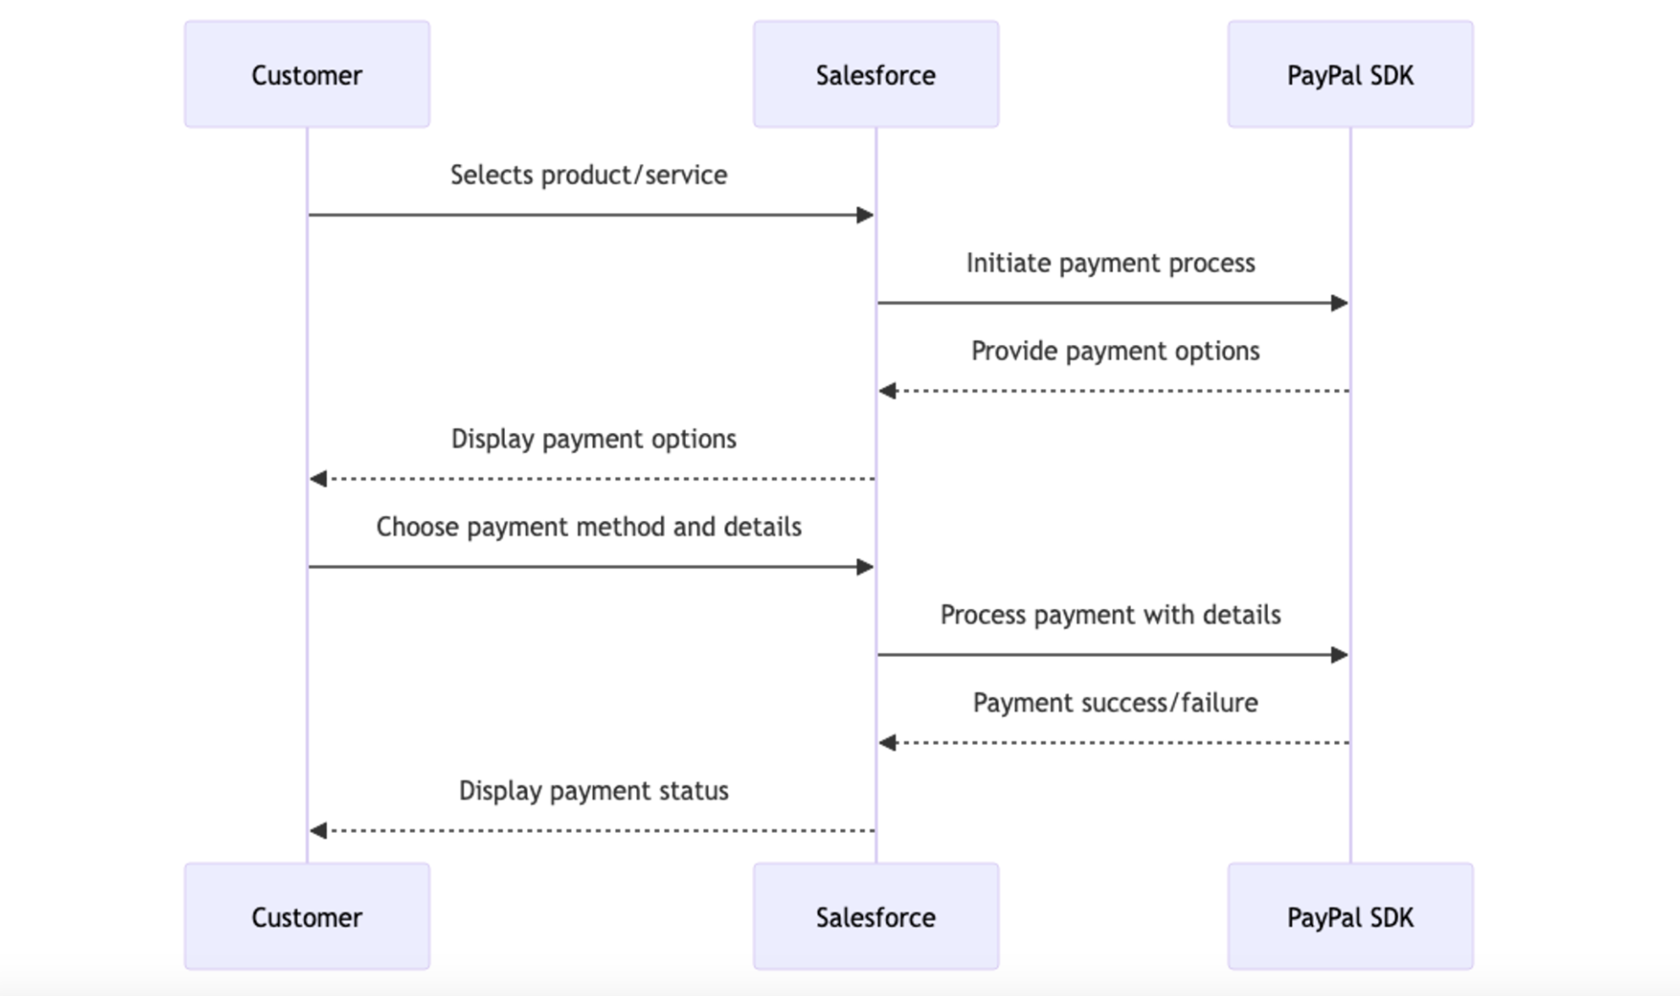
You can use the JavaScript SDK to render payment buttons, and credit and debit card form fields (hosted-fields).
Drop-in UI vs Hosted Fields
Integrating Braintree's Drop-in UI and Hosted Fields into Salesforce offers distinct advantages and challenges. Here’s a pros and cons approach that incorporates your remarks and reflects on broader considerations:
Drop-in UI
Pros:
Cons:
Hosted Fields
Pros:
Cons:
Drop-in UI
Pros:
- Quickly embeds a comprehensive payment UI into Salesforce applications, reducing development time.
- Provides a seamless and intuitive payment experience with minimal effort.
- Ensures security and compliance without complex measures on the merchant's side.
- Supports various payment methods.
Cons:
- Limited options for customization and branding.
- Dependence on Braintree’s UI design choices, potentially leading to a generic checkout experience.
- Managing third-party scripts and ensuring they align with Salesforce’s security model.
Hosted Fields
Pros:
- Offers the ability to create a custom, branded payment form.
- Developers have greater control over the checkout experience.
- Handles sensitive payment information securely.
Cons:
- Requires more development work, including custom validation, styling, and error handling.
- Achieving the desired look and feel can be time-consuming.
- Embedding Hosted Fields can be challenging within Salesforce’s security context (LockerService in LWC).
Payment Integration Demo
When working with LWC in Salesforce and integrating with external libraries like Braintree's Drop-in UI, one common issue is accessing DOM elements directly. This is because LWC operates in a Shadow DOM for encapsulation and security, which restricts direct DOM access and manipulation.
If you use Braintree Drop-in with Light DOM enabled, you will receive the following error. Either html element and selector doesn’t currently work as it should, so the Braintree SDK should be used with Shadow DOM-enabled component.
If you use Braintree Drop-in with Light DOM enabled, you will receive the following error. Either html element and selector doesn’t currently work as it should, so the Braintree SDK should be used with Shadow DOM-enabled component.
{
   "name":"DropinError",
   "message":"options.selector or options.container must reference a valid DOM node."
}
Another limitation in the LWC context is the Drop-in UI’s inability to fully support Google Pay, attributed to the missing allow=”payment” attribute necessary for payment authorisation within iframes.
[Violation] Permissions policy violation: payment is not allowed in this document.This technical hurdle can prevent the full utilisation of Braintree's Drop-in UI, especially for businesses looking to leverage Google Pay alongside other payment methods.
Using Payment Request API with cross-origin iframes.
In 2024, it’s still necessary to create a Visualforce page to integrate third-party libraries.
If your requirements are limited to debit card authorization, you can implement Drop-in with lwc.
Using Payment Request API with cross-origin iframes.
In 2024, it’s still necessary to create a Visualforce page to integrate third-party libraries.
If your requirements are limited to debit card authorization, you can implement Drop-in with lwc.
LWC Braintree Client implementation
By the end of this section, you will have a clear understanding of how to effectively use the LWC Braintree library to enable secure and efficient payment processing within your Salesforce solution. Additionally, you will learn how to leverage Vercel Serverless functions to streamline the implementation of the backend server, enabling smooth communication between the frontend and the payment gateway.
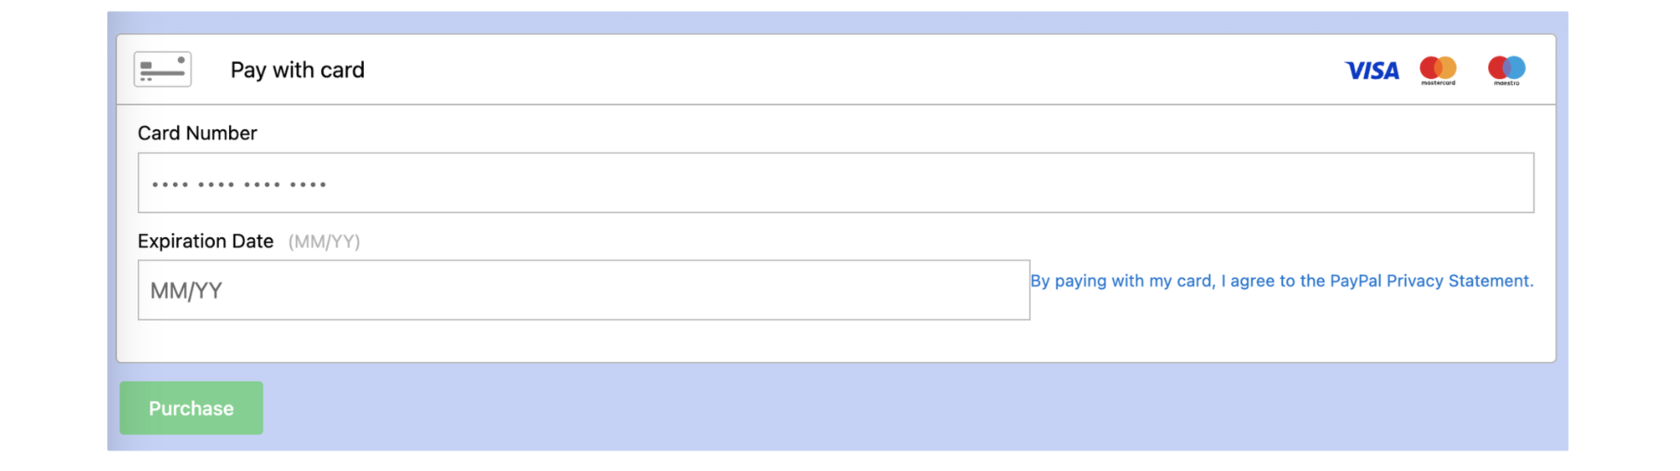
Debit Card checkout flow
Debit Card checkout flow
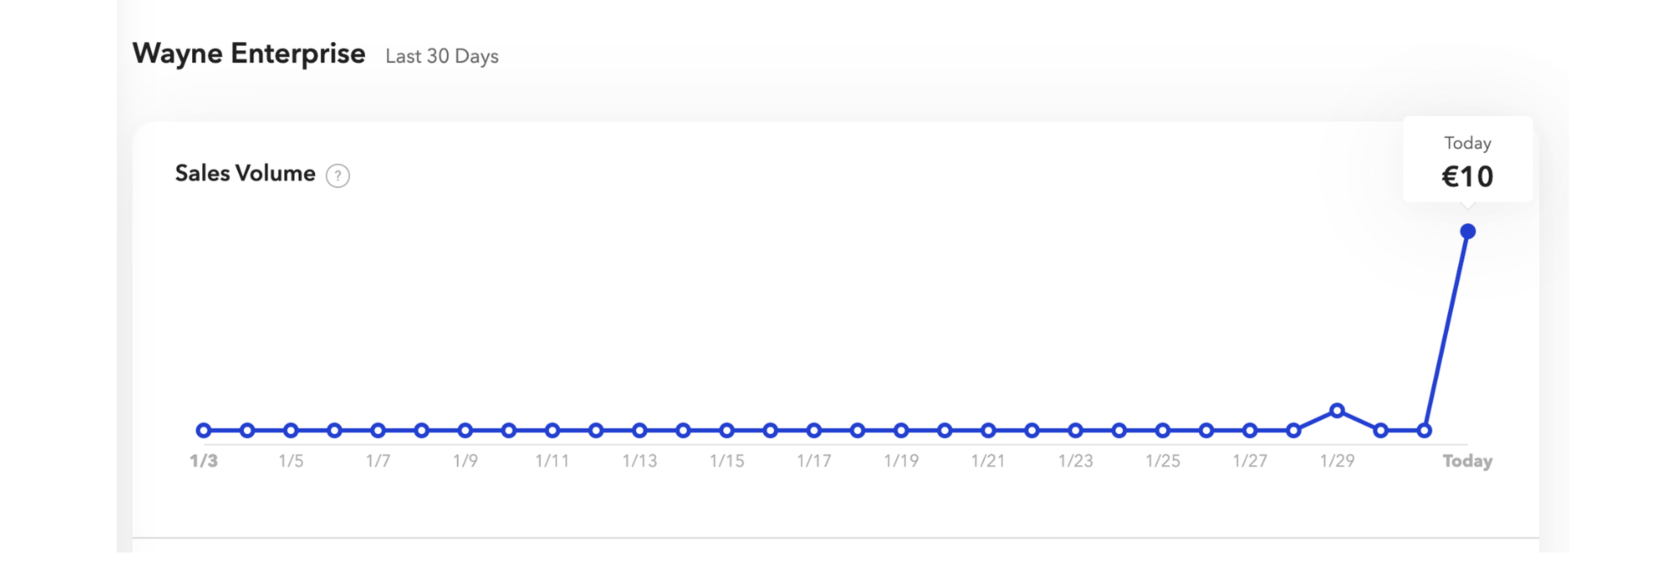
Processed transactions can be found at Braintree home page.
braintreePayment.html
<template >
    <div lwc:ref="dropinContainer"></div>
    <button id="submit-button" class="button button--small button--green" onclick={handlePay}>Purchase</button>
</template>
braintreePayment.js
import { LightningElement } from "lwc";
import { loadScript } from "lightning/platformResourceLoader";
import braintreeZip from "@salesforce/resourceUrl/braintree";

export default class BraintreePayment extends LightningElement {
    instance;
    loaded = false;
    connectedCallback() {
        this.initBraintree();
    }

    async initBraintree() {
        if (this.loaded) {
            return;
        }
        this.loaded = true;
        try {
            await Promise.all([loadScript(this, braintreeZip + "/braintree/dropin.min.js")]);

            let sdk = window.braintree;
            let container = this.refs.dropinContainer;
            let dropinInstance = await sdk.dropin.create({
                authorization: "sandbox_d5nprxpr_whf33646k9nf5ncs",
                container: container,
            });
            this.instance = dropinInstance;
        } catch (e) {
            console.error("loading js failed", JSON.stringify(e));
        }
    }

    async handlePay(event) {
        let payload = await this.instance.requestPaymentMethod();
        let responseStream = await fetch("https://demo-backend.vercel.app/api/braintree/checkout", {
            method: "POST",
            body: JSON.stringify({ paymentMethodNonce: payload.nonce }),
            headers: {
                "Content-Type": "application/json",
            },
        });
        let response = await responseStream.json();
        await this.instance.teardown();
        if (response.success) {
            console.log("Your Drop-in UI is working! Check your https://sandbox.braintreegateway.com/login sandbox Control Panel for your test transactions.");
        } else {
            console.log("Error", response);
        }
    }
}
Don’t forget adding the following CSP directives
To obtain a tokenization key, follow these steps:
- Braintree-web CSP
- Backend API url (replace https://demo-backend.vercel.app with your own)
To obtain a tokenization key, follow these steps:
- Log into sandbox Control Panel
- Click on the gear icon in the top right corner
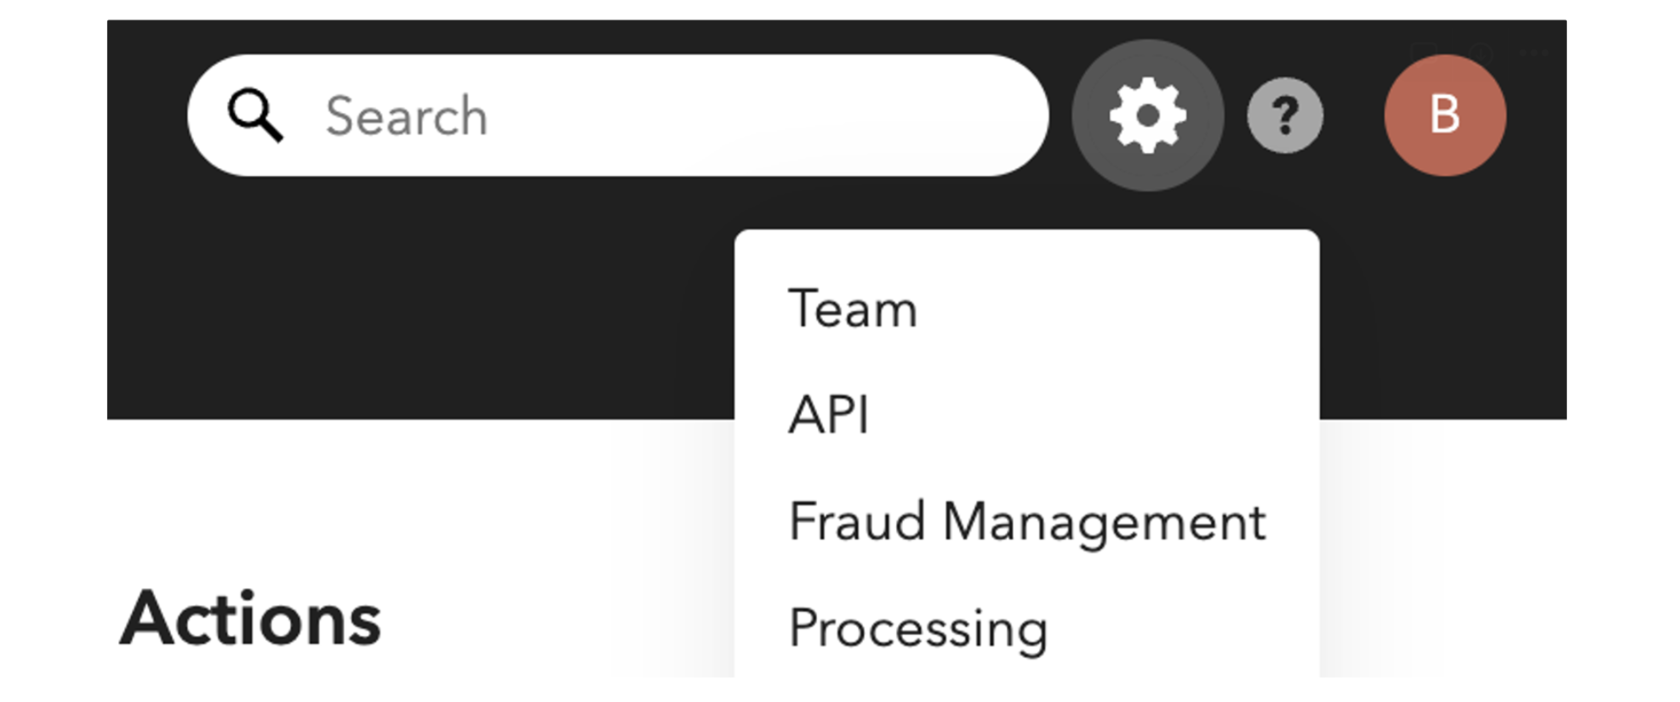
- Click API from the drop-down menu
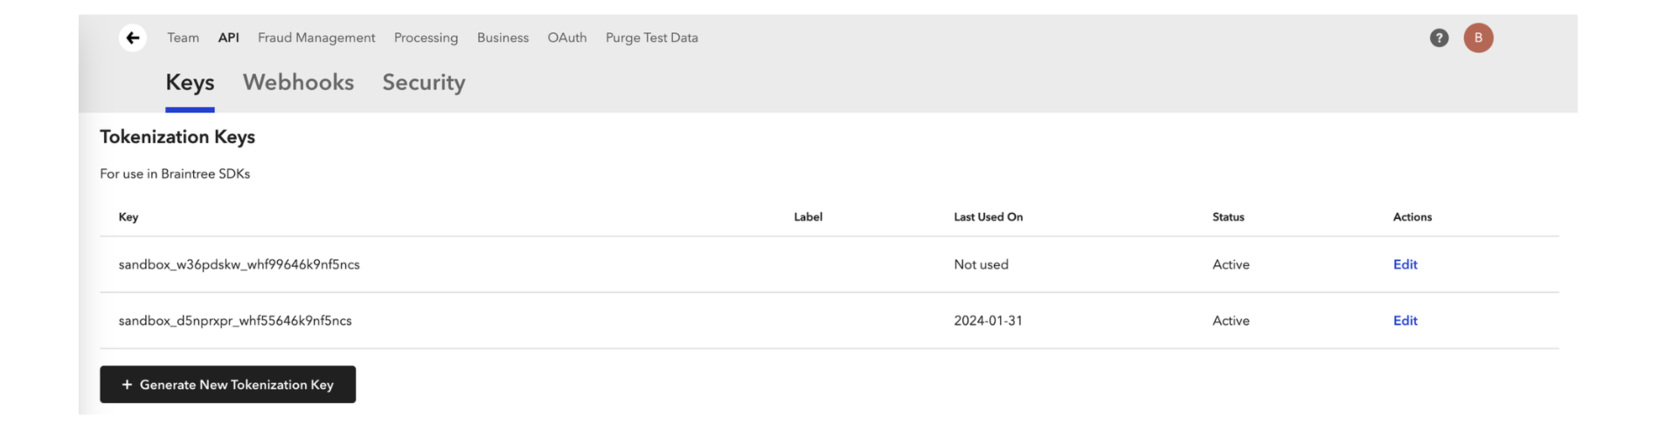
- Scroll to the Tokenization Keys section
- Create your own tokenization key
Download braintree js sdk and put to static resource, it should look like this:
https://js.braintreegateway.com/web/dropin/{version}/js/dropin.min.js,
where {version} is the actual version from Braintree Docs
After you put the LWC to Flexipage, the following markup will be rendered in element with ref dropinContainer.
https://js.braintreegateway.com/web/dropin/{version}/js/dropin.min.js,
where {version} is the actual version from Braintree Docs
After you put the LWC to Flexipage, the following markup will be rendered in element with ref dropinContainer.
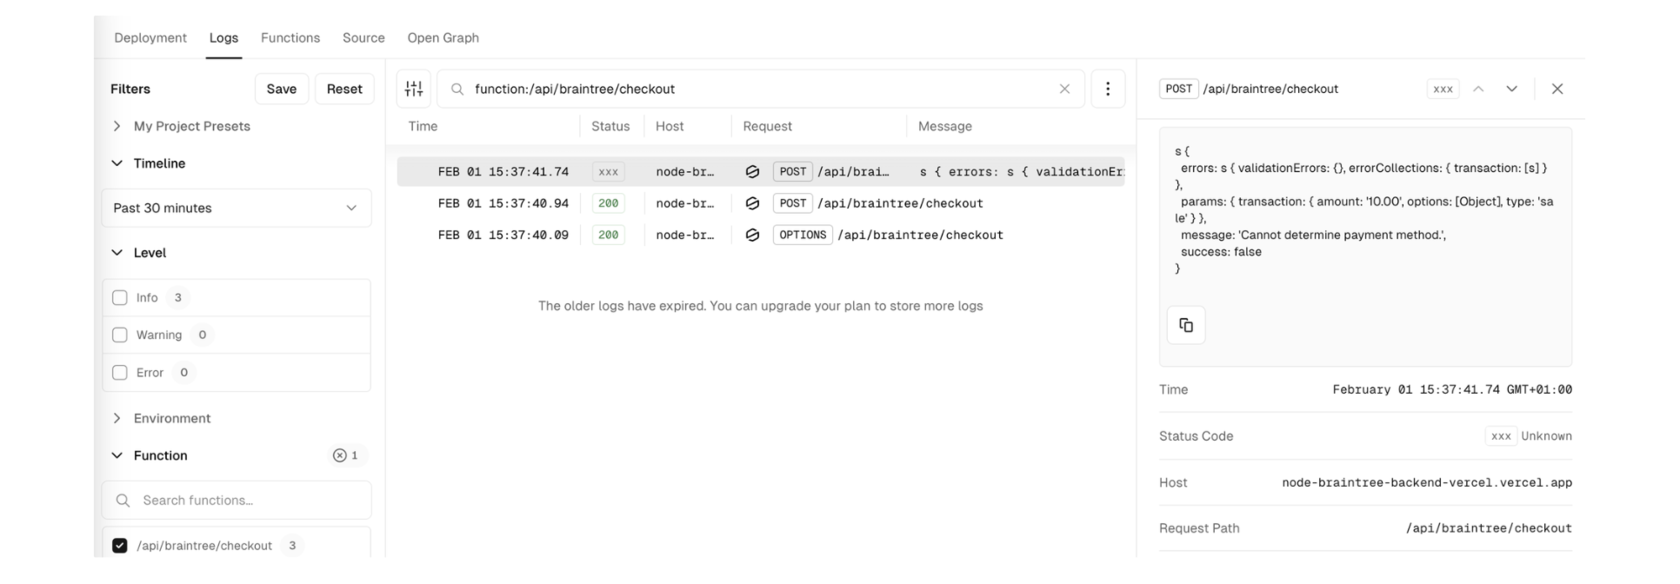
To accept payment information, user’s data should be sent to backend. It could be either LWC→Apex→Node.js route, but LWC→Node.js is possible too.
Vercel vs Heroku
Vercel can speed up the implementation of backend server for Salesforce developer, since the only thing is needed to set up is one router function.
For those who are familiar with Heroku, Vercel provides similar smooth experience in static site publishing, deployment and monitoring.
For those who are familiar with Heroku, Vercel provides similar smooth experience in static site publishing, deployment and monitoring.
Cool thing, Vercel provides free hobby instances, just like Heroku did before discontinuance of free plan.
Since Vercel is the company maintaining Next.js framework, we will use it on our server too.
To create Next.js app, use the following command.
Since Vercel is the company maintaining Next.js framework, we will use it on our server too.
To create Next.js app, use the following command.
npx create-next-app@latest
Follow the suggested cli prompts to create a project.
What is your project named? my-app
Would you like to use TypeScript? No / Yes
...
Would you like to use TypeScript? No / Yes
...
To simplify integration access to to the Braintree Gateway, a server-side Braintree SDK can be installed via npm.
npm install braintree --save
To demo checkout flow, we will create just one Vercel serverless function.
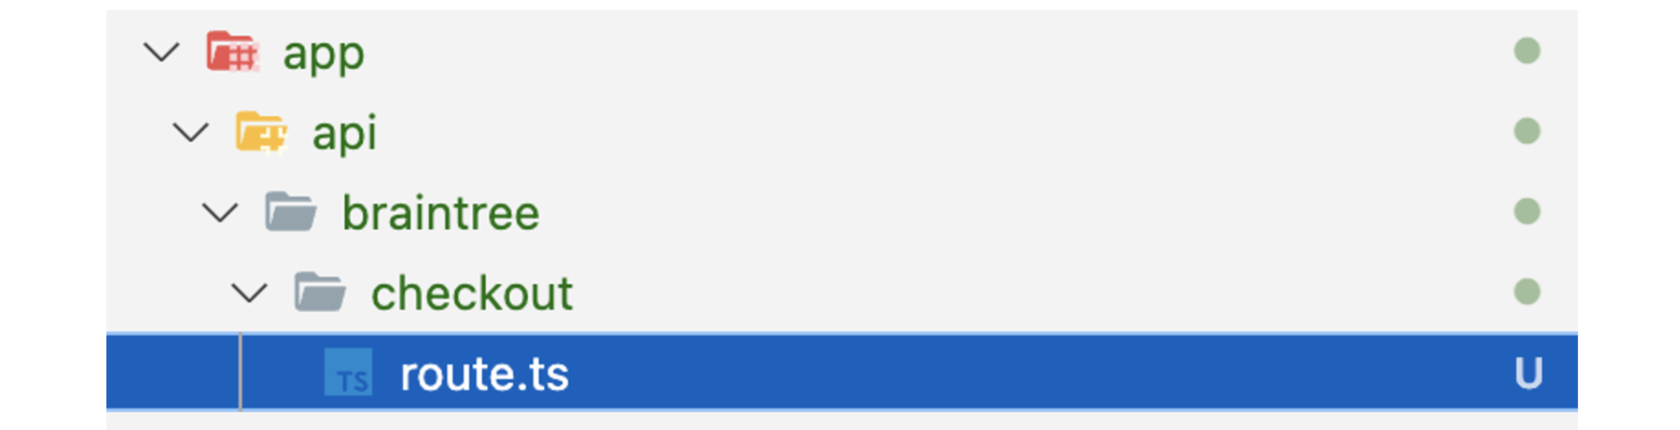
Folder structure under root app is automatically mapped to API endpoint /api/braintree/checkout
route.js
import { NextResponse } from "next/server";
import type { NextRequest } from "next/server";
import { BraintreeGateway, Environment } from "braintree";

export const POST = async (request: NextRequest) => {
    const body = await request.json();
    const gateway = new BraintreeGateway({
        environment: Environment.Sandbox,
        merchantId: "whf33646k9nf5ncs",
        publicKey: "6sht3v2xzn9q2sf8",
        privateKey: "95c4da9669b5ca53bcfb67024e404808",
    });

    const nonceFromTheClient = body.paymentMethodNonce;
    if (!nonceFromTheClient) {
        return NextResponse.json({error: "nonce cannot be blank"}, {
            status: 400,
            headers: getCorsHeaders(),
        });
    }
    const newTransaction = await gateway.transaction.sale({
        amount: "10.00",
        paymentMethodNonce: nonceFromTheClient,
        options: {
            submitForSettlement: true,
        },
    });

    return NextResponse.json(newTransaction, {
        status: 200,
        headers: getCorsHeaders(),
    });
};

const getCorsHeaders = () => {
    const headers = {
        "Access-Control-Allow-Methods": "GET,DELETE,OPTIONS,PATCH,POST,PUT",
        "Access-Control-Allow-Headers": "X-CSRF-Token, X-Requested-With, Accept, Accept-Version, Content-Length, Content-MD5, Content-Type, Date, X-Api-Version",
        "Access-Control-Allow-Origin": "*",
    };
    return headers;
};

export const OPTIONS = async (request: NextRequest) => {
    return NextResponse.json(
        {},
        {
            status: 200,
            headers: getCorsHeaders(),
        }
    );
};MerchantId, PublicKey and PrivateKey can be obtained from the API Keys section of Braintree sandbox Control Panel.
For demo implementation, CORS headers are generated to allow any origin Access-Control-Allow-Origin": "*", in actual implementation it should be restricted to your Salesforce orgs domain.
To publish your application, use the following command.
For demo implementation, CORS headers are generated to allow any origin Access-Control-Allow-Origin": "*", in actual implementation it should be restricted to your Salesforce orgs domain.
To publish your application, use the following command.
vercel --prod
Visualforce PayPal SDK Implementation
In this section, we will explain how to implement the Visualforce PayPal SDK without the need for a backend server. This approach allows you to use PayPal JavaScript SDK for the checkout experience and utilize Salesforce only to display payment options and save the completed payment transaction.
PayPal button flow
PayPal button flow
<apex:page controller="PaypalPaymentCtrl" showHeader="false" sidebar="false" standardStylesheets="false">
<script src="https://www.paypal.com/sdk/js?client-id=sb¤cy=EUR"></script>
<div id="paypal-button-container"></div>
<script>
paypal.Buttons({
createOrder: function (data, actions) {
return actions.order.create({
purchase_units: [{
amount: {
value: '10.00'
}
}]
});
},
onApprove: function (data, actions) {
return actions.order.capture().then(function (details) {
let paymentDto = parsePayPalResponse(details);
savePaymentDetails(paymentDto);
console.log('Transaction completed by ', details.payer.name.given_name);
});
}
}).render('#paypal-button-container');
function savePaymentDetails(paymentDto) {
var paymentDataJson = JSON.stringify(paymentDto);
Visualforce.remoting.Manager.invokeAction(
'{!$RemoteAction.PaypalPaymentCtrl.savePayment}',
paymentDataJson,
function (result, event) {
if (event.status) {
console.log('Payment saved', result);
} else {
console.log('Error saving payment');
}
}
);
}
function parsePayPalResponse(response) {
return {
orderId: response.id,
status: response.status,
amount: response.purchase_units[0].amount.value,
xCurrency: response.purchase_units[0].amount.currency_code,
payerEmail: response.payer.email_address,
payerName: `${response.payer.name.given_name} ${response.payer.name.surname}`,
};
}
</script>
</apex:page>public class PaypalPaymentCtrl {
public class PaymentData {
public String orderId;
public String status;
public String amount;
public String xCurrency;
public String payerEmail;
public String payerName;
}
@RemoteAction
public static String savePayment(String paymentDataJson) {
PaymentData paymentData = (PaymentData)JSON.deserialize(paymentDataJson, PaymentData.class);
PaymentAuthorization paymentAuth = new PaymentAuthorization();
paymentAuth.Status = 'Processed';
paymentAuth.ProcessingMode = 'External';
paymentAuth.Amount = Decimal.valueOf(paymentData.amount);
insert paymentAuth;
return 'Success';
}
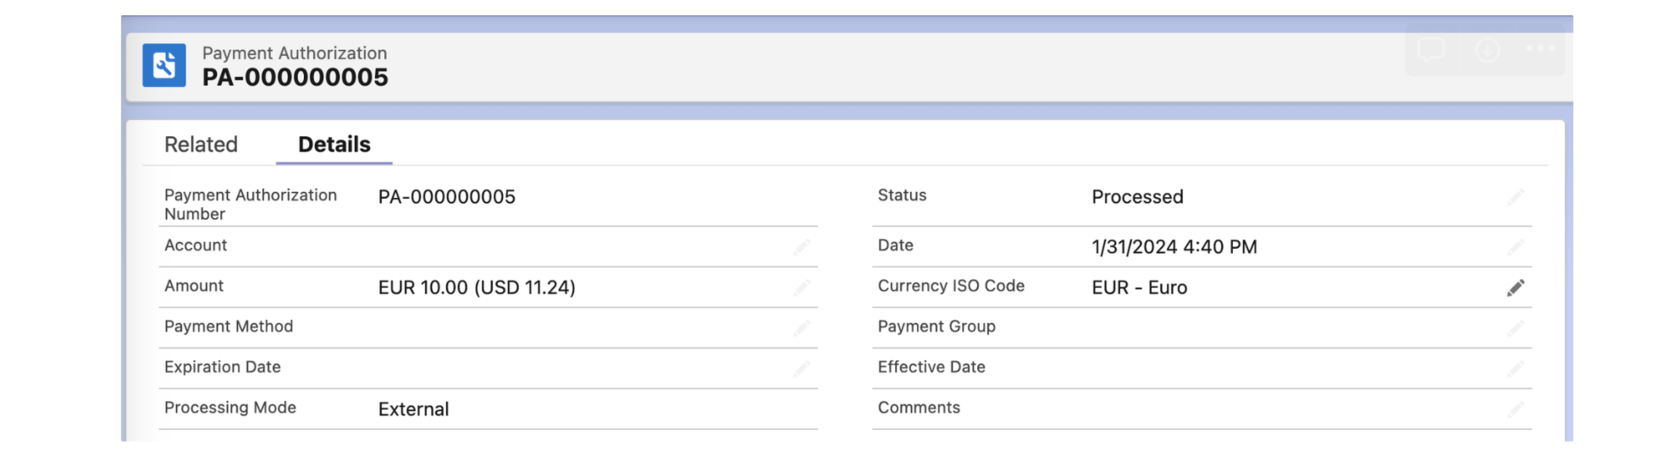
}Note: PaymentAuthorization is a standard Salesforce object, available with Salesforce Payments license. You can create custom object to save payment details.
Clicking the PayPal button initiates the browser popup with PayPal checkout flow.
Notice the sandbox url is used in popup, because of the test script sdk instance.
This is controlled by client-id=sb parameter in script src.
Clicking the PayPal button initiates the browser popup with PayPal checkout flow.
Notice the sandbox url is used in popup, because of the test script sdk instance.
This is controlled by client-id=sb parameter in script src.

The PayPal sandbox supports these account types:
If you don’t have a usual PayPal account, create one to access the developer portal.
Navigate to Developer Dashboard to create Personal account for executing payments.
Sandbox personal account always ends with @personal.example.com email domain.
- Personal – The customer in a transaction.
- Business – The merchant in a transaction.
If you don’t have a usual PayPal account, create one to access the developer portal.
Navigate to Developer Dashboard to create Personal account for executing payments.
Sandbox personal account always ends with @personal.example.com email domain.
After the checkout flow is finished, the following JSON is available to save transaction and create a payment record.
{
  "orderId": "57443461NR723715C",
  "status": "COMPLETED",
  "amount": "10.00",
  "currency": "EUR",
  "payerEmail": "sb-rczkx29511364@personal.example.com",
  "payerId": "SCHSHFWJE9N8E",
  "payerName": "John Doe",
  "payerAddress": "Lul. Dubois Stanisława 121, Łódź, 93-474, PL",
  "payeeEmail": "barco.09-facilitator@gmail.com",
  "payeeMerchantId": "YQZCHTGHUK5P8",
  "createTime": "2024-01-30T11:49:28Z",
  "updateTime": "2024-01-30T11:51:20Z",
  "captureId": "9XX41187YX114115B"
}
Payment Authorization Record created with Apex controller
Summary
Integrating third-party libraries into Salesforce remains challenging due to its closed platform architecture and lack of open-source reusable components. Nonetheless, the widespread adoption of JavaScript features, such as the Fetch API and enhanced DOM manipulation capabilities within LWC, has now made it feasible to incorporate SDKs for checkout flows. Additionally, it's important to highlight that the LWC Locker Service has seen significant improvements, resulting in fewer false positives compared to earlier experiences of searching for compatible jQuery libraries.
Useful Links
