


This article is prepared by our developer Alina Radziuk.
Efficient and timely deployments are crucial for the success of any project. In the realm of Salesforce development, optimizing the deployment process is essential to minimize downtime, reduce errors and enhance productivity. One powerful approach to achieve that is using the SFDX Git Delta plugin. It’s a free open-source plugin that helps to validate and deploy only selective metadata changes.
The specific goal is to establish a smooth process of validating the changes on creating a pull request to the specific branch and deploying the changes once this pull request is merged.
In this article we will explore how to use the SGD plugin within an Azure DevOps project and briefly describe what configurations are needed to start building a pipeline and provide an example of the YAML file created for validation and deployment metadata changes to the specific environment.

Project Structure:
Our project follows the Git Flow branching strategy. The repository consists of two main branches: 'master' and 'uat'. The 'master' branch represents the stable production-ready code, while the 'uat' branch is used as an integration branch for ongoing development work and corresponds to the state we have in the uat Salesforce org. Additionally, 'feature' branches are created to work on new features.
SFDX Git Delta:
As mentioned earlier, it’s an open-source plugin that can be utilized within any CI/CD pipeline (Jenkins, Bitbucket, GitHub Actions…). The plugin compares the current state of the project's metadata with the previous commit or a specific branch in the Git repository, whatever you decide to configure depending on your project’s needs, and generates a list of modified metadata components (so-called “delta” changes). By including only the metadata that has undergone changes, this delta enhances efficiency and minimizes deployment time.
Benefits of the SGD:
1. Time-saving: Deploying only delta changes reduces the overall deployment time by excluding unnecessary data transfers. This ensures minimal disruptions and rapid deployments.
2. Efficient change tracking: Deploying only delta changes makes it easier to track and manage specific modifications made to the system over time. This simplifies the process of identifying the source of issues and makes it easier to rollback to a previous working state if needed.
3. Reliable deployments: By deploying only delta changes, the risk of errors and conflicts is significantly reduced and it results in a lower risk of deployment failures. So organizations can ensure smoother deployment processes and improve system stability.

Creating a YAML Pipeline using SFDX Git Delta in Azure DevOps:
Before you begin, ensure that you have a Git repository set up with your project code.
Configuration of authentication and creation of a connected app:
Documentation to follow can be found at the links below:
Link 1.
Link 2.
In our example we store variables used within the pipeline as a variable group named “sf-credentials”.
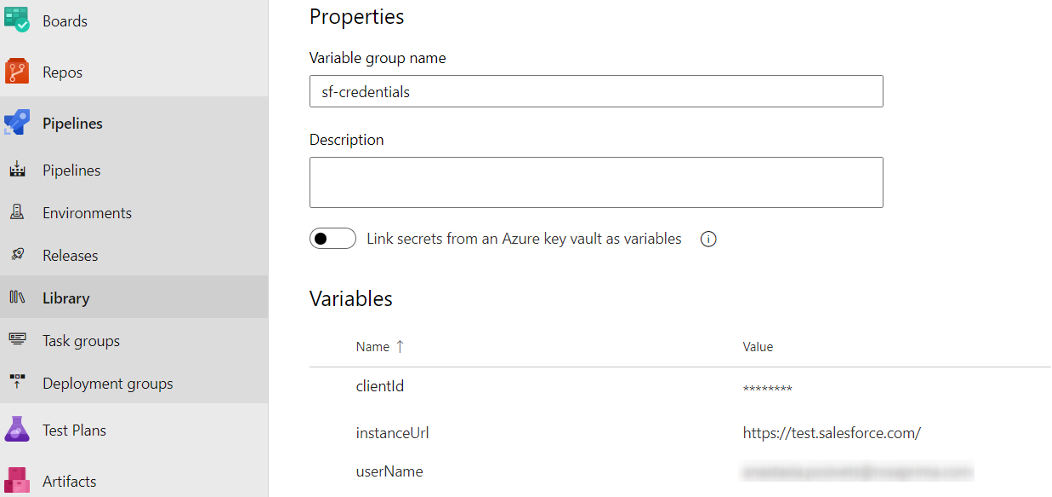
And it contains the following:
clientId – the client id from the created connected app
instanceUrl – an url of the salesforce instance (https://test.salesforce.com/ – for a testing environments, https://login.salesforce.com/ – for production)
userName – administration user’s username
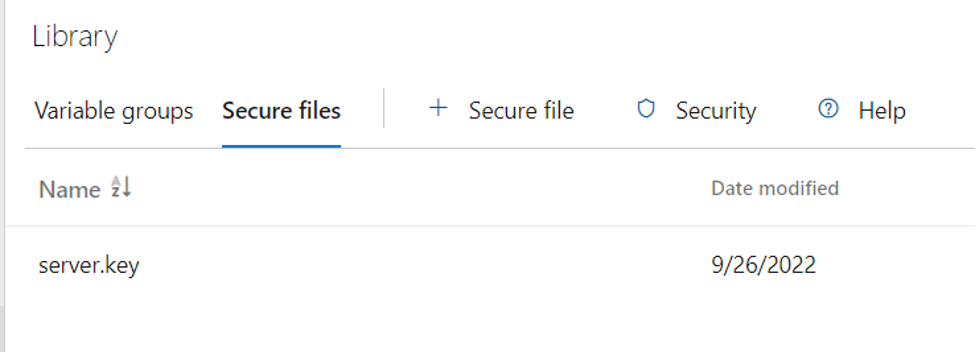
To establish authorization for the pipeline, the server.key file is uploaded as a secure file in the same library section:
Pipeline Configuration
- Go to the Pipelines section and click on "New Pipeline" to create a new pipeline.
- In the "Where is your code?" section, select the “Azure Repos Git”
- Choose your salesforce project for “Select your repository”
- In the “Configure” section select “Starter Pipeline”
Below you’ll find an example of a yml file used to validate changes against the uat branch. The “Starter pipeline” code must be replaced with it and saved.
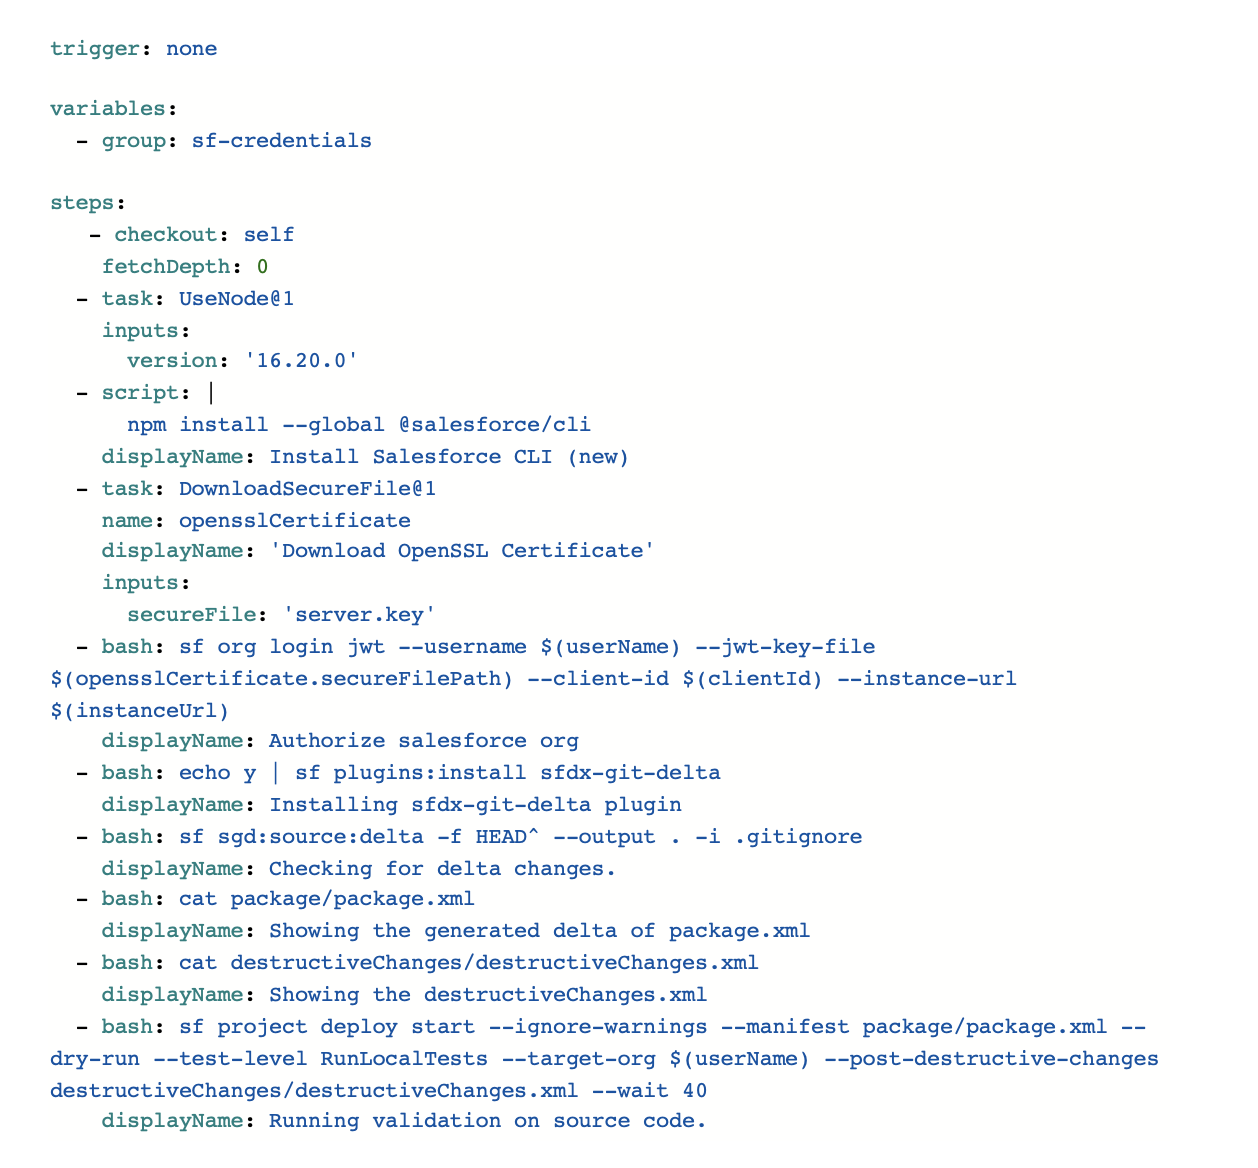
The SGD documentation is pretty descriptive and their readme file provides clear instructions for all the steps.
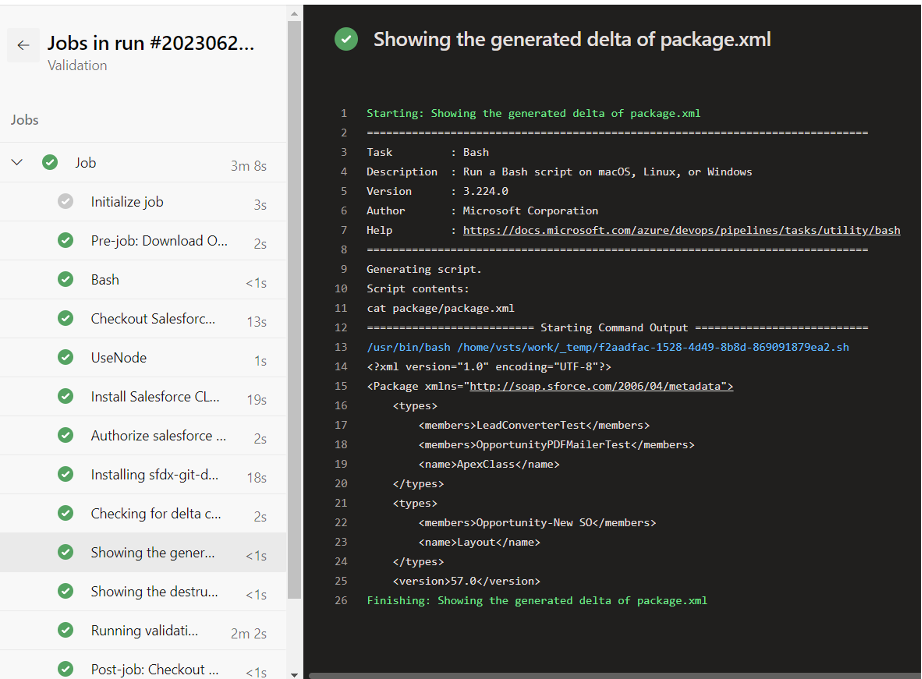
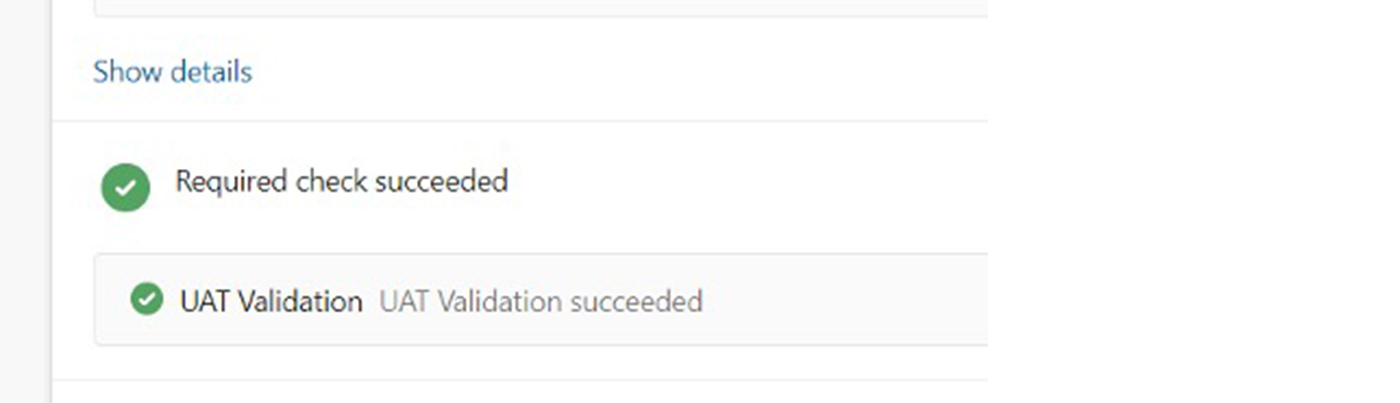
This code generates a difference between the current commit and its parent commit, excluding any files or directories specified in the .gitignore file. The generated package as well as destructive changes can be viewed in the pipeline details:
This code generates a difference between the current commit and its parent commit, excluding any files or directories specified in the .gitignore file. The generated package as well as destructive changes can be viewed in the pipeline details:
To have the validation run on the merge request, branch policies must be configured:
Click on the branch setting and go to the “branch policies”, find the build validation and select the created pipeline as a build one.
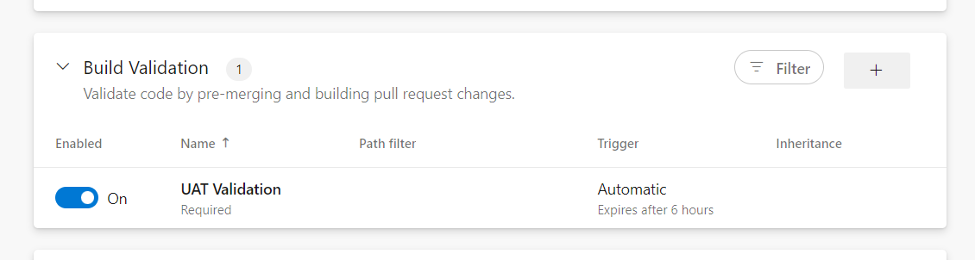
With this setup, we now have a convenient and automated validation process that displays the validation status within the pull request.
In the same way, a deployment pipeline can be created. The code looks almost the same but has some slight differences. Firstly, we don’t have to set any branching policies but can specify branch triggers to run the pipeline only on specific branch changes. And of course, the deploy command doesn’t include the --dry-run modifier to actually deploy the changes.

